1
00:00:03,000 --> 00:00:05,866
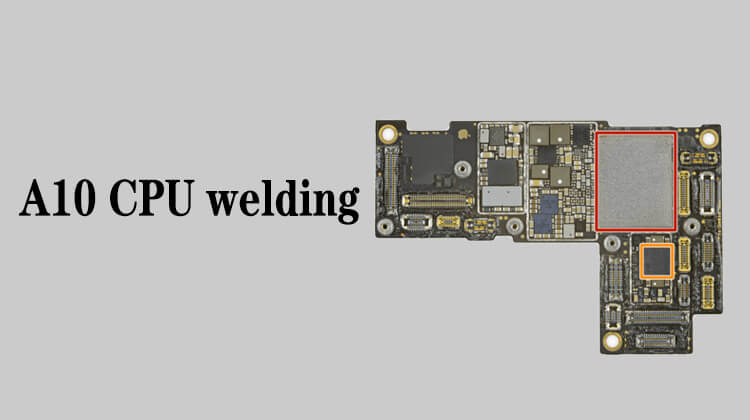
After the dissassembly, let's look at the pads
2
00:00:08,266 --> 00:00:10,466
Check if there are some pads are off
3
00:00:11,566 --> 00:00:13,733
Especially those pins on the edge
4
00:00:14,633 --> 00:00:18,900
Pay attention to these pads where the surface is relatively flat
5
00:00:22,733 --> 00:00:25,200
to see if there is any pads break-off
6
00:00:25,433 --> 00:00:29,900
If the pads break off, there will be a layer of bright yellow on the surface
7
00:00:30,133 --> 00:00:32,433
It is the pin ripped from the CPU
8
00:00:35,466 --> 00:00:38,300
The surface we see now is silvery white,
9
00:00:38,366 --> 00:00:39,366
it doesn't matter
10
00:00:40,233 --> 00:00:42,233
Although some individual pads did not melt
11
00:00:43,300 --> 00:00:47,033
But this is tin, it didn't stick the pads off
12
00:00:47,300 --> 00:00:49,966
We focus on the upper and lower sides
13
00:00:51,566 --> 00:00:56,300
The tin on the top side is all melted so it couldn't fall off a bit
14
00:00:58,666 --> 00:01:01,500
There is a pad break-off, in the middle area
15
00:01:10,100 --> 00:01:14,200
This is basically because the CPU has been dropped before
16
00:01:24,033 --> 00:01:29,866
Pad break-off is generally because you go to pry the CPU while the tin has not melted
17
00:01:30,666 --> 00:01:35,466
As can be clearly seen in this area, the solder has completely melted
18
00:01:35,700 --> 00:01:39,400
And this solder, it is not particularly flat,
19
00:01:40,000 --> 00:01:42,766
The tin in this area has also melted
20
00:01:43,000 --> 00:01:44,900
it is a little convex
21
00:01:45,266 --> 00:01:49,733
This kind of pad is a little loose before we disassemble the CPU
22
00:01:52,633 --> 00:01:55,766
This area of the corresponding CPU can also be seen,
23
00:01:56,900 --> 00:01:59,300
there are several pads break-off
24
00:02:02,600 --> 00:02:06,233
You can't see clearly because it was stabbed by a knife
25
00:02:09,533 --> 00:02:14,000
There are 3 pads break-off here and 2 here
26
00:02:14,233 --> 00:02:17,200
So there are total 5 pads break-off
27
00:02:20,666 --> 00:02:24,800
In this area, pad break-off will continue when we go to scrape
28
00:02:25,066 --> 00:02:28,900
Because this area fell before it was disassembled
29
00:02:29,866 --> 00:02:34,966
Or there is some kind of pulling force on the board that pulls the pad away
30
00:02:40,633 --> 00:02:45,700
In this case, we need to apply the green oil before scraping the glue,
31
00:02:50,233 --> 00:02:53,066
Prevent the tin from getting on when scrapin
32
00:02:54,533 --> 00:02:58,566
Let's clean it first before we apply the green oil
33
00:03:18,733 --> 00:03:22,266
I washed it a little, and the other pads broke off
34
00:03:24,466 --> 00:03:27,866
Now there are total 8 pads break-off
35
00:03:34,200 --> 00:03:40,500
So this pappened because it had a heavy fall, pads would easily break off when we touch it
36
00:03:42,800 --> 00:03:49,333
as for this kind of CPU, when we need to move board, most of them are to be polished
37
00:03:49,900 --> 00:03:55,733
Turn the pcb over, punch it through, and hit the areas where solders are
38
00:03:57,000 --> 00:04:01,433
After that, just bring it over, and clean up the glue on the side a little.
39
00:04:01,700 --> 00:04:05,466
Directly reball, and then install it on the motherboard
40
00:04:05,600 --> 00:04:08,766
As you can see, there are some pads break-off here
41
00:04:08,966 --> 00:04:12,666
But some pads wouldn't break off when they are just a little loose
42
00:04:12,733 --> 00:04:16,733
There is some glue on this side, if we pry it directly,
43
00:04:17,033 --> 00:04:18,733
it will easily break off
44
00:04:19,100 --> 00:04:22,300
This is the case for all CPUs after A10
45
00:04:22,466 --> 00:04:25,366
These pads are particularly fragile
46
00:04:25,700 --> 00:04:31,233
As long as the blowing temperature is enough, if the pads break-off still happen
47
00:04:31,466 --> 00:04:33,733
it has nothing to do with our technique
48
00:04:33,900 --> 00:04:37,866
Whether the temperature is enough mainly depends on the pads
49
00:04:39,633 --> 00:04:41,133
If the pads are flat
50
00:04:41,300 --> 00:04:43,733
like these, or these
51
00:04:46,866 --> 00:04:52,166
This kind is relatively flat, and pad break-off next to it or itself.
52
00:04:52,533 --> 00:04:56,633
That is because the temperature of our disassembly is not enough
53
00:04:57,266 --> 00:05:01,800
But like this area, obviously the pad around him has melted
54
00:05:02,900 --> 00:05:06,466
If the pads break off again, it's not because of the temperature.
55
00:05:11,966 --> 00:05:16,366
Now let's use the curing light to cure it after we finish the green oil
56
00:05:42,433 --> 00:05:45,900
Now, the CPU pad break-off preprocessing is finished