1
00:00:02,500 --> 00:00:04,200
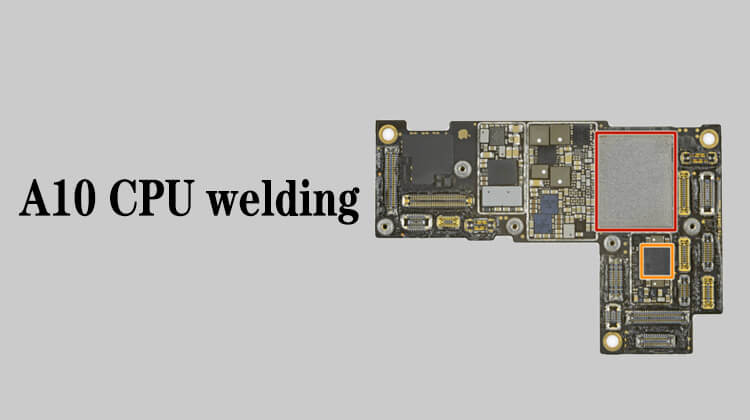
Next we scrape the chip
2
00:00:05,400 --> 00:00:10,133
Similarly, we put the low melt solder first and flatten with a soldering iron
3
00:00:25,100 --> 00:00:25,966
When we're flattening,
4
00:00:25,966 --> 00:00:29,033
the small glass crystal on the A10 cpu may be
5
00:00:29,033 --> 00:00:31,200
dragged off by the soldering iron
6
00:00:31,600 --> 00:00:32,500
it doesn't matter
7
00:00:33,366 --> 00:00:35,400
Because this crystal is not glued
8
00:00:35,766 --> 00:00:38,566
and is very easy to be dragged off by the soldering iron
9
00:00:41,700 --> 00:00:44,966
but it won't make any difference
10
00:00:49,433 --> 00:00:52,233
The next model like a 11 a12 a13 a14
11
00:00:54,400 --> 00:00:57,500
The glass crystals on them will not be dragged off easily
12
00:00:57,933 --> 00:00:59,566
when flatten the low melt solder
13
00:00:59,666 --> 00:01:00,833
because they are glued
14
00:01:10,300 --> 00:01:12,566
The soldering iron moves a little faster,
15
00:01:17,133 --> 00:01:19,200
don't stop in a certain area
16
00:01:29,566 --> 00:01:32,733
After flattening the low melt solder, next we start scraping
17
00:01:33,633 --> 00:01:36,466
Take a look at this area where the pads are loose
18
00:01:38,033 --> 00:01:40,833
check if there are any other pads break off
19
00:01:41,100 --> 00:01:42,566
No other found yet
20
00:01:43,533 --> 00:01:45,000
we continue to scrape
21
00:01:53,300 --> 00:01:59,133
The rotatry air gun, 230 degrees, and the air volume is level 3-4
22
00:02:01,466 --> 00:02:03,866
But we use the blade differently than before
23
00:02:04,266 --> 00:02:08,600
This is a small soft blade we used to pry hard drives and wifi before,
24
00:02:10,166 --> 00:02:11,366
It is very thin
25
00:02:13,166 --> 00:02:16,600
The edges have also been polished and are relatively rounded.
26
00:02:18,200 --> 00:02:20,300
Its scraping force is very small
27
00:02:23,100 --> 00:02:27,466
Use this blade to scrape the cpu after A10, the pads won't break off
28
00:02:31,000 --> 00:02:33,833
We also blow the tin first to make it melted.
29
00:02:49,566 --> 00:02:52,233
Then cut the blade without laying it flat on it
30
00:02:53,166 --> 00:02:55,833
Otherwise, the pad break off will easily happen
31
00:02:56,200 --> 00:02:57,700
We should stand the blade up,
32
00:02:58,100 --> 00:02:59,766
slightly sideways towards us
33
00:03:00,300 --> 00:03:02,100
Then drag it diagonally to the back
34
00:03:04,366 --> 00:03:06,133
This force is very small
35
00:03:06,366 --> 00:03:08,300
When it encounters an obstacle,
36
00:03:09,033 --> 00:03:10,466
it automatically bends and bounces over
37
00:03:11,933 --> 00:03:13,200
and won't take the pad off
38
00:03:14,000 --> 00:03:16,433
Because the blade is so soft and flexible
39
00:03:29,433 --> 00:03:32,233
We tried a lot of ways to scrape this cpu
40
00:03:32,333 --> 00:03:35,466
Later, we found that this method is more suitable
41
00:03:35,466 --> 00:03:38,300
for novices to master, using this blade
42
00:03:42,533 --> 00:03:46,066
Pads break-off will easily happen when you use a hard blade.
43
00:04:52,433 --> 00:04:55,666
Now let's check if there are more pads break off
44
00:05:02,200 --> 00:05:04,633
We can see there are 3 more pads broke off
45
00:05:07,200 --> 00:05:08,900
We didn't find that just before,
46
00:05:09,000 --> 00:05:12,166
but we can see it clearly after we zoom in on this area,
47
00:05:12,800 --> 00:05:16,266
They should have broken off when we flattened the low melt solder.
48
00:05:21,533 --> 00:05:25,366
If this kind of break-off occurs before disassembling the cpu,
49
00:05:25,966 --> 00:05:27,833
there will never be only one pad.
50
00:05:30,100 --> 00:05:32,766
It's all around this kind of looseness will be more.
51
00:05:36,133 --> 00:05:39,100
It was caused by the whole board pulling when it fell
52
00:05:45,100 --> 00:05:49,600
Fortunately, the pads broke off are in the middle area
53
00:05:51,766 --> 00:05:53,766
If they are on the edge,
54
00:05:54,466 --> 00:05:56,300
This basically needs to be filled
55
00:05:58,700 --> 00:06:00,333
Let't take a look at this area
56
00:06:05,566 --> 00:06:07,066
This point is very loose
57
00:06:08,200 --> 00:06:10,400
It was all torn off when it fell.
58
00:06:23,233 --> 00:06:25,466
Although it did not fall off when prying,
59
00:06:26,100 --> 00:06:28,900
but when scraping or flattening th low melst solder,
60
00:06:29,600 --> 00:06:31,333
it fell off with a light touch.
61
00:06:44,133 --> 00:06:45,566
This one is the same
62
00:06:48,666 --> 00:06:51,700
When the position near the component is not easy to scrape,
63
00:06:52,200 --> 00:06:54,566
we can use tweezers to push gently
64
00:06:59,700 --> 00:07:01,566
But this component is cracked
65
00:07:03,233 --> 00:07:06,600
So, we just drag it off by using the soldering iron
66
00:07:22,766 --> 00:07:24,100
It's almost done
67
00:07:27,466 --> 00:07:29,433
But there's a little bit of glue here
68
00:07:32,600 --> 00:07:33,766
Just drag it off
69
00:08:05,033 --> 00:08:08,400
Well, the CPU scraping, we have almost finished