1
00:00:04,066 --> 00:00:07,400
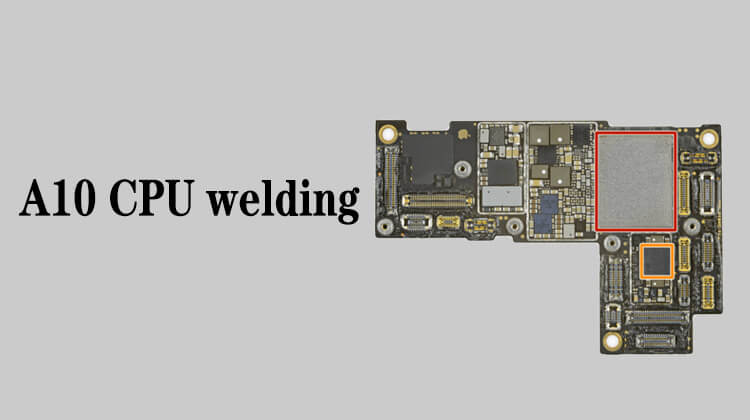
All CPU after A10 use this yellow substrate
2
00:00:08,333 --> 00:00:10,166
What is this yellow substrate?
3
00:00:11,733 --> 00:00:15,933
The flex cables of charge connector we usually replace for the phones,
4
00:00:17,300 --> 00:00:20,633
the flex cables of mainboards, camera and screen
5
00:00:21,466 --> 00:00:23,300
they are all soft and flexible
6
00:00:24,133 --> 00:00:26,066
We call it FPC
7
00:00:26,633 --> 00:00:28,666
which means flexible circuit board
8
00:00:32,966 --> 00:00:36,466
All CPUs after the A10 use this flexible circuit board
9
00:00:37,000 --> 00:00:39,066
A thin layer, very, very thin
10
00:00:39,266 --> 00:00:41,266
We can stand the chip up and take a look
11
00:00:45,666 --> 00:00:47,366
This is the yellow skin
12
00:00:48,300 --> 00:00:49,966
Very, very thin
13
00:00:50,166 --> 00:00:52,500
Less than 0.1 mm thick
14
00:01:03,033 --> 00:01:06,466
And there's a lot of wires going on all over the substrate
15
00:01:08,000 --> 00:01:10,300
Why do you use this soft blade when you scrape?
16
00:01:14,733 --> 00:01:19,000
because if you use harder blades you might accidentally scratch the visible wires
17
00:01:26,400 --> 00:01:28,766
And then what do we do with the points broke off
18
00:01:31,833 --> 00:01:34,533
For example, there is a point broke off on this area
19
00:01:35,800 --> 00:01:37,700
Let's take a look at its periphery
20
00:01:40,566 --> 00:01:43,666
There is a triangle-like shape, an irregular triangle
21
00:01:47,900 --> 00:01:50,933
We painted the green oil on this position in the middle
22
00:01:51,633 --> 00:01:56,600
This position up here has already been clicked, being pulled out of a pit
23
00:01:58,266 --> 00:02:00,566
This solder spot is pretty obvious
24
00:02:01,466 --> 00:02:04,466
A circular pit can be clearly seen in the center
25
00:02:04,800 --> 00:02:07,100
And this one is also pretty obvious
26
00:02:07,566 --> 00:02:10,300
All pads are silver- white round metal skin
27
00:02:13,833 --> 00:02:15,333
After you put it in this position,
28
00:02:15,333 --> 00:02:17,833
you burn it in the middle with a laser
29
00:02:18,466 --> 00:02:21,500
And stick the silver-white metal skin to the substrate
30
00:02:27,566 --> 00:02:31,933
Once the silver-white metal skin is stretched by external force
31
00:02:32,433 --> 00:02:35,000
It will tear the flexible circuit board together,
32
00:02:35,600 --> 00:02:37,100
and make a pit here
33
00:02:40,333 --> 00:02:44,566
The bottom of the pit is the trace of the lower layer of the circuit board
34
00:02:45,300 --> 00:02:48,900
In order to prevent the position of the drop point on the upper layer
35
00:02:49,066 --> 00:02:53,566
and the traces of the circuit board on the lower layer from being short-circuited
36
00:02:54,300 --> 00:02:57,266
So, we're going to paint it a little bit of green oil
37
00:02:57,266 --> 00:02:58,800
in the middle of the pit
38
00:02:59,333 --> 00:03:02,100
Then we see that there is an irregular triangle
39
00:03:02,166 --> 00:03:03,933
on the periphery of this pit
40
00:03:04,566 --> 00:03:07,766
This area is the power supply or ground for this pad
41
00:03:13,200 --> 00:03:16,733
Because of the middle area, it only has power or ground
42
00:03:17,133 --> 00:03:19,533
So if we say we want to make up for this
43
00:03:21,333 --> 00:03:27,333
We just need to scrape off the yellow insulation on the surface of this triangle and scrape out the copper
44
00:03:35,433 --> 00:03:36,833
The chip is not fixed
45
00:03:37,333 --> 00:03:38,433
Clamp the chip to it
46
00:03:42,166 --> 00:03:44,866
Scrape this with a very new sharp blade
47
00:03:46,233 --> 00:03:49,000
Don't use that dull blade, you can't scrape with it
48
00:04:49,100 --> 00:04:52,233
When scraping off, the green oil was scraped loose again,
49
00:04:53,000 --> 00:04:56,433
Because this green oil is applied before we drag the tin,
50
00:04:56,766 --> 00:04:58,366
it will be slightly thicker
51
00:05:01,533 --> 00:05:04,033
And now we'll scrape this layer of insulation
52
00:05:04,033 --> 00:05:07,233
off this irregular triangular surface
53
00:05:07,733 --> 00:05:11,500
The middle position still needs to be filled with green oil to cover it
54
00:05:12,166 --> 00:05:14,433
Prevent the tin on the top from sticking to
55
00:05:14,433 --> 00:05:17,000
the tin on the bottom when we reball the tin
56
00:05:21,733 --> 00:05:24,133
This way, the outer area is scraped out
57
00:05:25,766 --> 00:05:27,633
This solder repairing is done
58
00:05:28,666 --> 00:05:31,500
When we reball it, it can be glued to the tin
59
00:05:40,866 --> 00:05:43,966
This is the repairing of the CPU after A10
60
00:05:51,666 --> 00:05:55,500
If you can't see the place we just scraped, you can look around it
61
00:05:58,033 --> 00:06:02,333
At this point, it is obvious that there is an irregular triangle, right?
62
00:06:02,700 --> 00:06:05,566
There is a contact here, here and here
63
00:06:06,133 --> 00:06:08,600
This area is the contact of this pad
64
00:06:16,833 --> 00:06:21,366
But it has a partition in the middle of this triangle, a transparent partition
65
00:06:23,500 --> 00:06:25,800
I can't see clearly with this microscope.
66
00:06:26,266 --> 00:06:27,133
Like this position,
67
00:06:27,266 --> 00:06:30,300
we can see the shape of a lowercase letter a
68
00:06:35,666 --> 00:06:37,066
This side is an arc,
69
00:06:37,333 --> 00:06:39,166
and then there are two spots here
70
00:06:39,633 --> 00:06:41,133
Every shape is different
71
00:06:41,466 --> 00:06:44,033
This one looks like a small eye that stands up
72
00:06:47,533 --> 00:06:49,733
And this one is like an olive arc
73
00:06:53,766 --> 00:06:57,233
It becomes a pit of smaller size, after the point broke off
74
00:06:58,766 --> 00:07:00,966
We just scrape the edge of the pit out
75
00:07:02,600 --> 00:07:05,933
Once the green oil is scraped off in the middle of the pit,
76
00:07:06,133 --> 00:07:08,266
apply green oil as before
77
00:07:22,700 --> 00:07:25,533
How big is the shape, we just scrape the same size
78
00:07:25,833 --> 00:07:30,066
Actually, just scrape a little copper foil along the perimeter of the pit
79
00:07:30,433 --> 00:07:32,666
so that it can be stained with tin
80
00:07:32,833 --> 00:07:34,733
Then, the repairing is done
81
00:07:35,133 --> 00:07:38,600
We use the same way for the broken pads outside the blank frame
82
00:07:38,866 --> 00:07:42,166
There are control signals on the wires outside the blank frame
83
00:07:43,100 --> 00:07:46,433
After the pads break off on this area, there will be a circle
84
00:07:46,700 --> 00:07:48,600
like a balloon, tied to a rope
85
00:07:51,700 --> 00:07:54,300
After it breaks off, there will be a pit in the middle
86
00:07:55,200 --> 00:07:57,166
Paint this pit with some green oil,
87
00:07:57,166 --> 00:07:59,666
and scrape the circle around it a little bit
88
00:08:00,966 --> 00:08:02,500
Then, put some tin on it
89
00:08:06,066 --> 00:08:09,800
Ok, this is the method of pads repairing on the CPU after A10