1
00:00:02,866 --> 00:00:05,866
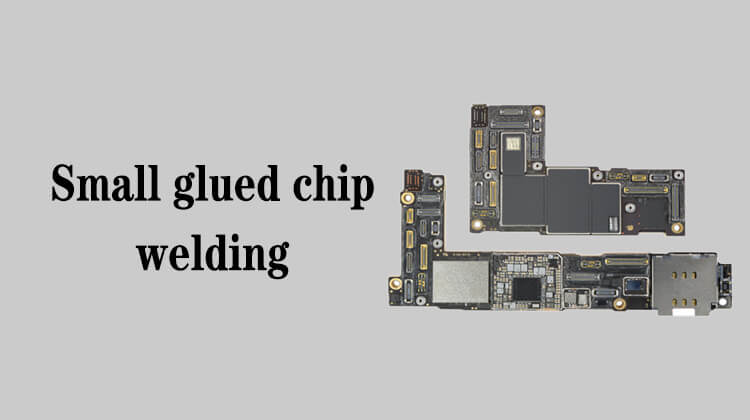
Next, let's look at the third way of disassembly
2
00:00:11,866 --> 00:00:15,466
This chip is useless after being disassembled in this way
3
00:00:23,300 --> 00:00:26,100
Firstly, we need to scrape off the paint-like coating
4
00:00:26,100 --> 00:00:28,466
on the chip surface to reveal its crystal
5
00:00:53,666 --> 00:00:56,633
Then apply a little flux on the surface of the chip
6
00:01:00,966 --> 00:01:04,400
Set the soldering iron to about 400 degrees
7
00:01:06,533 --> 00:01:09,866
Stick a little solder on the tip of the soldering iron,
8
00:01:10,400 --> 00:01:13,600
either low melt solder or medium melt solder is ok
9
00:01:20,600 --> 00:01:22,766
Then press the soldering iron onto the chip
10
00:01:24,000 --> 00:01:25,833
Push the tweezer to the edge of the chip
11
00:01:27,400 --> 00:01:30,433
This method is suitable for disassembling the chip that is
12
00:01:30,433 --> 00:01:33,666
close to the edge and has no components on one side
13
00:01:37,500 --> 00:01:40,166
The added flux and solder mainly play a role
14
00:01:40,166 --> 00:01:41,800
in temperature conduction
15
00:02:11,500 --> 00:02:15,433
In this case, it is better to use a soldering iron with a horseshoe tip,
16
00:02:16,333 --> 00:02:17,833
it's easier to operate
17
00:02:19,233 --> 00:02:21,966
Okay, press and push like this
18
00:02:28,566 --> 00:02:31,033
In this way, the chip is removed