1
00:00:00,300 --> 00:00:01,900
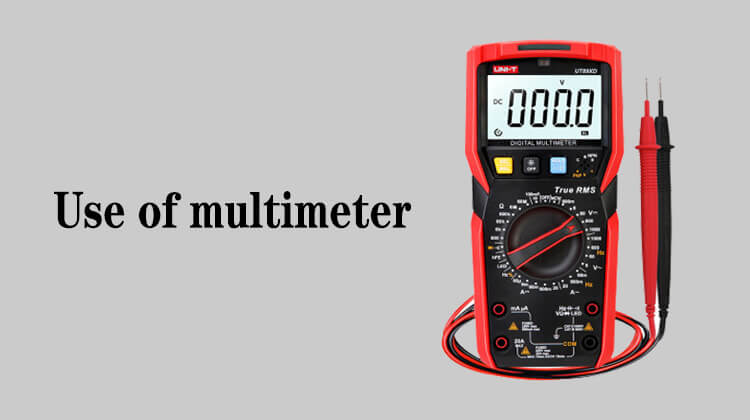
Usage of multimeter
2
00:00:02,466 --> 00:00:07,366
In this lesson, we mainly learn about the types and installations of multimeters
3
00:00:07,833 --> 00:00:12,933
Multimeters are also called multiplexers because they have more functions to measure
4
00:00:14,100 --> 00:00:17,733
Multimeter is an indispensable tool in circuit board maintenance
5
00:00:20,133 --> 00:00:21,800
According to the display mode,
6
00:00:21,933 --> 00:00:26,900
the multimeter can be divided into pointer multimeter, digital multimeter
7
00:00:27,433 --> 00:00:31,933
In daily maintenance, most of the digital multimeters are used
8
00:00:32,566 --> 00:00:36,033
Because the digital multimeter displays clear values,
9
00:00:36,500 --> 00:00:38,133
it is easy to watch
10
00:00:39,000 --> 00:00:42,166
The pointer multimeter relies on the pointer to swing,
11
00:00:42,600 --> 00:00:44,966
and the value is not intuitive enough
12
00:00:46,400 --> 00:00:49,266
Most of the early maintenance personnel used it
13
00:00:49,766 --> 00:00:55,900
Digital multimeters are divided into manual range multimeters and automatic range multimeters
14
00:00:57,066 --> 00:01:01,000
Manual range refers to the need to adjust the range when measuring
15
00:01:02,400 --> 00:01:06,933
The automatic range multimeter does not require us to adjust the range,
16
00:01:07,466 --> 00:01:09,933
it will automatically identify the range
17
00:01:10,666 --> 00:01:13,533
Multimeters are frequently used in maintenance
18
00:01:15,100 --> 00:01:19,433
We can use a multimeter to measure line voltage, line connection,
19
00:01:19,633 --> 00:01:24,300
diode value, and the quality of electronic components, etc.
20
00:01:26,866 --> 00:01:28,933
The composition of the multimeter
21
00:01:29,100 --> 00:01:32,533
The new multimeter includes a complete set of accessories,
22
00:01:33,066 --> 00:01:36,000
including the multimeter, batteries,
23
00:01:36,333 --> 00:01:38,033
and measuring markers
24
00:01:42,233 --> 00:01:45,366
Some multimeters have a temperature measurement function,
25
00:01:45,600 --> 00:01:49,133
and the accessories also include a temperature measurement line
26
00:01:50,266 --> 00:01:52,000
Let's take a look at the real thing
27
00:01:53,366 --> 00:01:55,966
In the picture are two digital multimeters,
28
00:01:57,400 --> 00:02:00,233
the one on the left is a manual range multimeter,
29
00:02:02,500 --> 00:02:05,733
and the one on the right is an automatic range multimeter
30
00:02:07,400 --> 00:02:12,333
The measurement range of the automatic range multimeter is automatically recognized
31
00:02:12,800 --> 00:02:14,566
Manual range multimeter,
32
00:02:14,666 --> 00:02:19,133
we need to select the appropriate range according to the size of the component
33
00:02:19,800 --> 00:02:21,733
If the range selection is wrong,
34
00:02:21,966 --> 00:02:26,500
it will marker to the inability to judge whether the components are good or bad
35
00:02:27,166 --> 00:02:29,033
When the multimeter is in use,
36
00:02:29,466 --> 00:02:33,233
it is necessary to install the battery and test markers first
37
00:02:33,766 --> 00:02:38,300
Let me take VC890D multimeter as an example to demonstrate
38
00:02:39,166 --> 00:02:42,433
Let's open the battery cover on the back of the multimeter first,
39
00:02:44,366 --> 00:02:46,366
we can see the buckle of the battery
40
00:02:48,766 --> 00:02:51,566
This multimeter uses a 9V battery
41
00:02:52,366 --> 00:02:55,200
We connect the positive and negative poles,
42
00:02:57,733 --> 00:03:01,366
put in the battery, and buckle the battery protection cover,
43
00:03:01,533 --> 00:03:04,100
so that the multimeter can be used normally
44
00:03:04,566 --> 00:03:08,400
It is also necessary to install test markers during measurement,
45
00:03:08,900 --> 00:03:12,533
which can be directly installed in the multimeter test marker jack
46
00:03:15,000 --> 00:03:16,800
When repairing mobile phones,
47
00:03:16,933 --> 00:03:20,600
it is necessary to use the test markers with fine needle points
48
00:03:21,366 --> 00:03:24,500
Because the components of the mobile phone are relatively small,
49
00:03:24,766 --> 00:03:26,566
if the test marker is too thick,
50
00:03:26,666 --> 00:03:29,133
it will cause a short circuit during measurement,
51
00:03:29,333 --> 00:03:31,400
resulting in damage to the mainboard
52
00:03:31,733 --> 00:03:35,966
Generally, the black test marker is inserted into the COM socket,
53
00:03:36,400 --> 00:03:39,533
and the red test marker is inserted into the red socket
54
00:03:40,366 --> 00:03:42,466
After the test markers are installed,
55
00:03:42,566 --> 00:03:46,366
we can measure components, measure voltages, etc.
56
00:03:46,800 --> 00:03:48,666
Ok, that's it for this lesson