1
00:00:00,700 --> 00:00:02,566
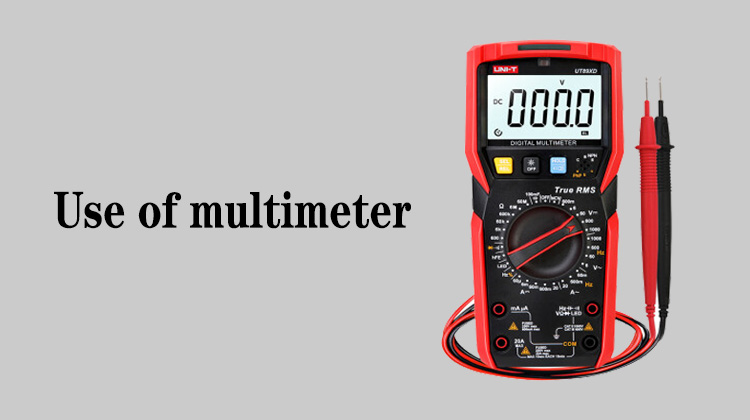
Usage of multimeter
2
00:00:03,366 --> 00:00:07,566
In this video we introduce the basic functions of the auto range multimeter
3
00:00:08,900 --> 00:00:13,633
Let me take FLUKE 15B+ automatic multimeter as an example to explain
4
00:00:17,866 --> 00:00:19,400
LCD display
5
00:00:20,066 --> 00:00:21,866
When we use a multimeter to measure,
6
00:00:22,233 --> 00:00:25,000
the display will display the corresponding value,
7
00:00:26,066 --> 00:00:30,133
and we can judge whether the component is good or bad according to the reading
8
00:00:35,266 --> 00:00:37,500
Manual/ automatic range switching
9
00:00:37,800 --> 00:00:41,900
When measuring, we can choose automatic range or manual range
10
00:00:42,566 --> 00:00:43,933
Data hold key
11
00:00:44,433 --> 00:00:49,233
When we press this button, the measured data will be fixed on the screen
12
00:00:50,800 --> 00:00:53,733
AC/ DC mV voltage range,
13
00:00:54,066 --> 00:00:57,266
this range is the AC and DC mV range
14
00:00:57,833 --> 00:00:59,233
DC voltage range
15
00:01:00,066 --> 00:01:02,833
When we measure the DC voltage of the circuit board,
16
00:01:03,400 --> 00:01:07,000
select the DC voltage range, it is automatic range
17
00:01:08,800 --> 00:01:10,133
Backlit button
18
00:01:10,633 --> 00:01:12,666
When we press the backlit button,
19
00:01:13,100 --> 00:01:15,933
the backlight of the display will be turned on
20
00:01:16,733 --> 00:01:18,200
AC voltage range
21
00:01:18,566 --> 00:01:22,300
When we measure AC, we need to use the AC voltage range
22
00:01:22,900 --> 00:01:27,100
For example, when measuring the domestic socket 220V,
23
00:01:27,500 --> 00:01:29,466
we need to adjust to this range
24
00:01:30,566 --> 00:01:31,566
OFF switch
25
00:01:32,900 --> 00:01:35,100
When the multimeter is in the OFF range,
26
00:01:35,200 --> 00:01:37,066
the multimeter will be turned off,
27
00:01:37,700 --> 00:01:40,100
and when it is adjusted to other ranges,
28
00:01:40,366 --> 00:01:42,800
the multimeter will be turned on automatically
29
00:01:43,400 --> 00:01:45,033
Function switch button
30
00:01:45,300 --> 00:01:47,933
This button is used to switch ranges,
31
00:01:48,800 --> 00:01:52,433
because some functions in the multimeter are integrated together
32
00:01:54,300 --> 00:01:56,500
When we need to use different functions,
33
00:01:56,733 --> 00:01:58,966
we can switch through the yellow button
34
00:02:00,166 --> 00:02:02,500
Buzzer/ diode/ ohm range
35
00:02:03,633 --> 00:02:09,100
This icon represents that the 3 functions of the multimeter are integrated in one range
36
00:02:10,600 --> 00:02:12,166
When we use different functions,
37
00:02:12,900 --> 00:02:15,033
we need to switch through the yellow button
38
00:02:17,366 --> 00:02:18,566
Capacitor range
39
00:02:19,033 --> 00:02:23,100
This range is specially used to measure the capacitance value of the capacitor,
40
00:02:23,700 --> 00:02:27,033
which can help us judge whether the capacitor is good or bad
41
00:02:29,500 --> 00:02:32,200
AC/ DC ampere current range
42
00:02:33,733 --> 00:02:39,433
This range is mainly used to measure the size of DC current, or the size of AC current
43
00:02:41,900 --> 00:02:45,300
This range is AC/ DC mA current range
44
00:02:46,633 --> 00:02:51,766
When adjusted to this range, we can measure DC current or AC current
45
00:02:53,166 --> 00:02:57,666
The current measured by this range is relatively small, at the mA level
46
00:03:02,900 --> 00:03:06,666
This range is the AC and DC uA current range,
47
00:03:08,566 --> 00:03:15,333
which can more accurately determine the magnitude of the DC current or the magnitude of the AC current
48
00:03:18,366 --> 00:03:21,466
The 4 jacks below the multimeter are marker jacks
49
00:03:22,366 --> 00:03:24,933
When we use different functions of the multimeter,
50
00:03:25,333 --> 00:03:28,866
we need to insert the markers into the corresponding jacks
51
00:03:29,400 --> 00:03:31,633
If we measure the voltage resistance,
52
00:03:33,066 --> 00:03:35,066
when the component is good or bad,
53
00:03:35,200 --> 00:03:38,833
we need to insert the red marker into the jack of the 惟 icon,
54
00:03:39,566 --> 00:03:42,666
and the black marker should be inserted into the COM jack
55
00:03:43,366 --> 00:03:44,900
If we measure the current,
56
00:03:45,300 --> 00:03:48,766
we need to insert the red marker into the A or mA jack
57
00:03:53,700 --> 00:03:57,466
The middle area belongs to the range selection knob of the multimeter
58
00:03:59,000 --> 00:04:03,500
When we measure different functions, we can measure by adjusting to different ranges
59
00:04:05,200 --> 00:04:07,233
Ok, that's all for this video


